
* All About Multirotor Drone Radio Transmitters and Receivers
All About Multirotor Drone Radio Transmitters and Receivers
One of the crucial pieces of equipment for a multirotor is a FPV Drone Radio
Transmitter (Tx) and Radio Receiver (Rx).
FPV Drone Radio Transmitters:
An FPV Drone Radio Transmitter is an electronic device that wirelessly transmits
radio signals to transmit commands wirelessly via a set of radio frequencies to the
Radio Receiver, which is connected to an aircraft or multirotor being remotely controlled.
In other words, it's the device that translates pilot's commands into movement of the multirotor.
We talk here about some manufacturers of radio's as example, but there are several other
good oneson the market as well like Radiolink, Futaba, Jeti and others.
In some radios there is an option to connect an external transmitter module.
This makes it possible to use a different frequency (for instance, 900MHz
in a 2.4GHz radio) or a different receiver from another fire / protocol
(This can be internal as an external module, or connection thrue the trainerport
like most long range UHF systems do).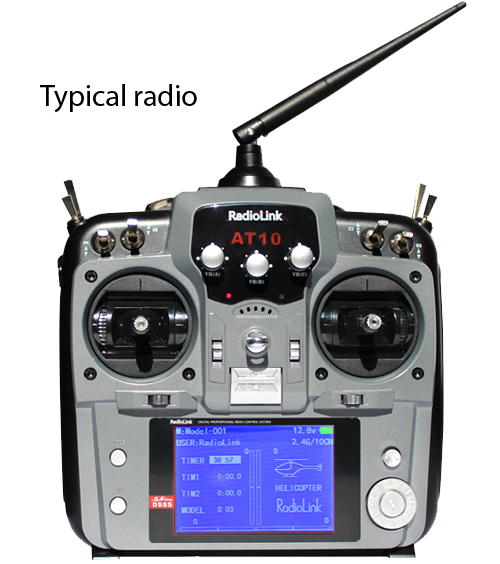
Typical FPV Drone Racing Radio Transmitter
Channels:
A FPV Drone Radio Transmitter transmits commands via channels.
Each channel is an individual action being sent to the aircraft.
Throttle, Yaw, Pitch and Roll are the four main inputs required to control the quad.
Each of them uses one channel, so there is minimum or four channels required.
Every switch, slider or knob on the transmitter uses one channel to send
information to the receiver.
The following is an example of the typical channel setup for FPV Racing:
a switch for arming the aircraft, for the different types of flight modes.
For this reason,it is advised to have a 6 channel radio.
Basic 4-6 channel radios are usually the cheapest.
Radios with more than 6 channels are typically more expensive.
Gimbals:
Gimbals are the sticks that translate a pilot into the digital data
transmitted to the radio receiver.
There are two types of gimbals commonly used:
Hall Effect Gimbal (digital)
Potentiometer type Gimbal (analogue)
Hall Effect gimbals use hall sensors with magnets to capture the stick position values
and is therefore more resistant to wear. These gimbals are also more precise.
Hall Sensor Gimbal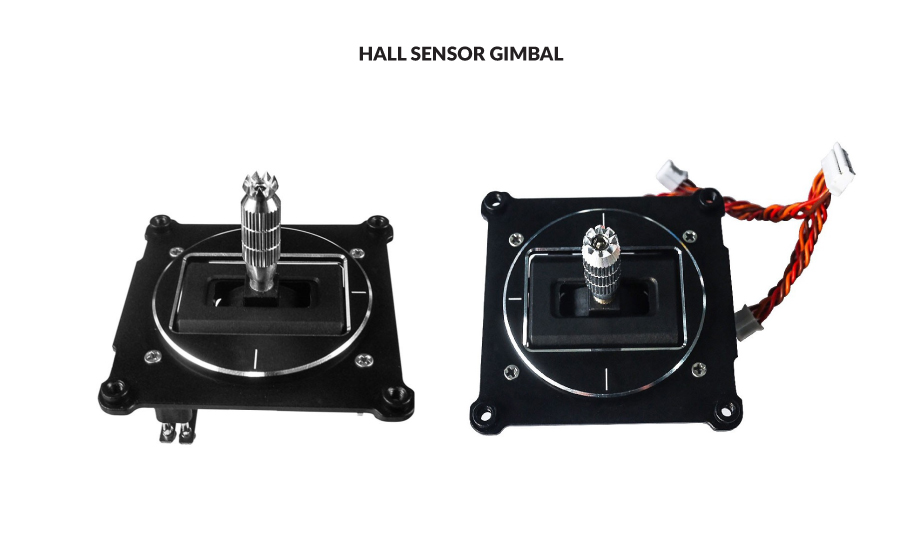
Potentiometer type gimbals uses a brush to capture the value of stick inputs and is
therefore prone to wear out much quicker.
Potentiometer Gimbal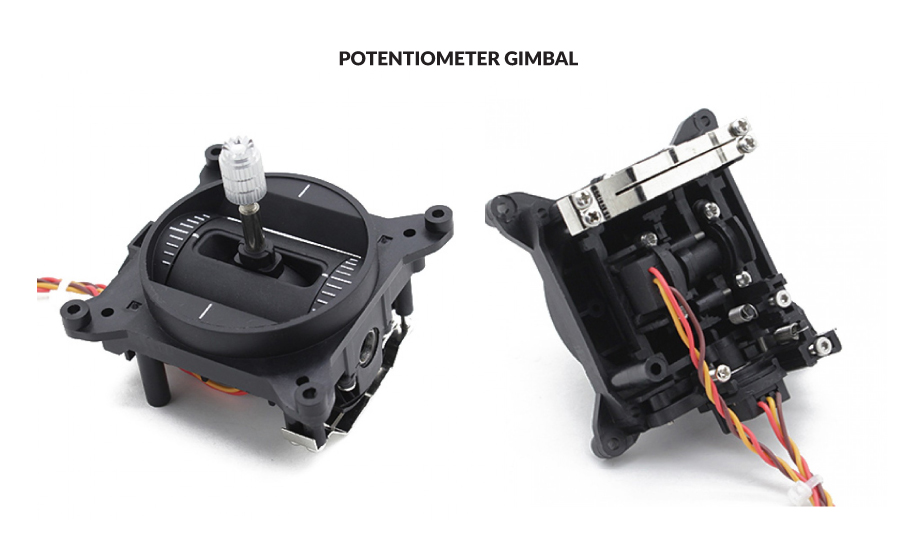
Gimbal sticks are manufactured with M3 or M4 threads which allows you to attach different
types of stick ends. Pilots that prefer flying with the "Pinch" method might prefer a different
type or stick to pilots that prefer flying with their thumbs.
In general, sticks are approximately 25-27mm in length.
They can be adjusted to suit personal preferences.
Below is an example of the different types of stick ends: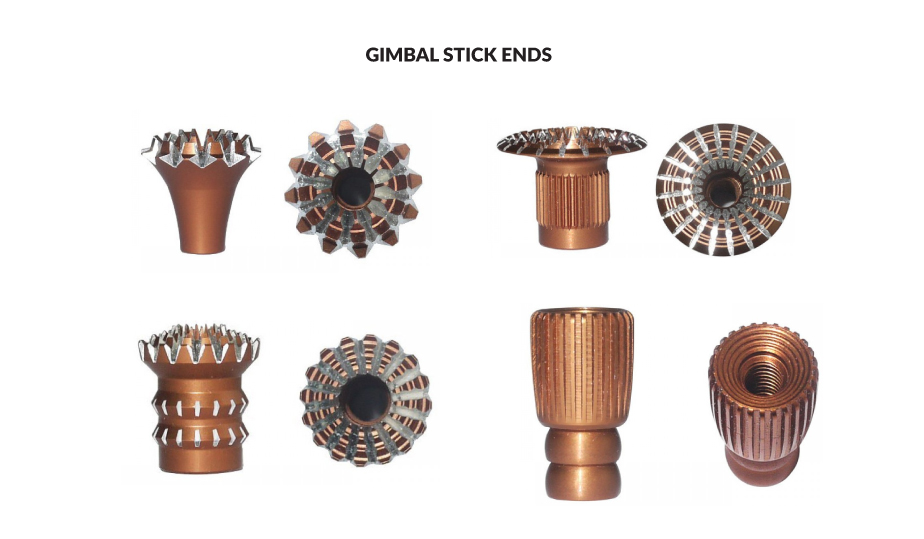
Different types of Gimbal Stick Ends for Radio Transmitter
FPV Drone Radio Transmitter Modes:
When purchasing an FPV Drone Radio Transmitter, you need to use when flying.
The mode of change of aircraft movement to a certain stick movement.
There are 4 transmitter modes with Mode 2 being the most popular and is usually set as
the default mode on most radios.
Difference between mode 1 and 2 for radio transmitter
Frequencies:
An FPV Drone Radio Transmitter commonly used the following frequencies:
27MHz, 72MHz, 433MHz, 900MHz, 1.3GHz and 2.4Ghz
433Mhz, 900Mhz and 1.3GHz are typically used in long range FPV and RC systems.
27Mhz and 72Mhz are older frequencies which were being used for many years in RC.
Equipment operating on frequencies used crystals to bind the Transmitter with a Receiver.
They are rarely used.
2.4GHz is most popular frequency. It is a newer technology and it offers "frequency hopping"
which is the job of managing multiple users at frequency transmitting at the same time.
This is done by scanning the frequency band and finding the best available channel during
the transmission. 2.4GHz antennas are very compact as well. Generally speaking,
the lower frequency, the larger the antenna. For that reason, 2.4GHz quickly became
the "go to" frequency.
Open TX:
OpenTX is an open source custom firmware made for RC radio transmitters,
compatible with the following radios: (January 2018)
1) FrSky Taranis X9D, Q7X, X9E
2) FrSky Horus X10, X12
3) Turnigy 9X
4) FlySky 9X
OpenTX is a highly configurable system offering options for all types of RC models.
It is created by FPV pilots with pilots in mind and has frequent updates that are released
with bug fixes and new features.
The main features of OpenTX is as follows:
In flight audio / speech feedback with custom sounds that are stored
on the transmitters Micro SD card
Can be a large number of models on the radio, even more if stored on the Micro SD card
Logical switches and special functions used to program custom behaviors on the radio (for instance
having a custom audio feedback on low battery voltage or high mAH consumption)
LUA scripts - a powerful tool for changing the parameters or Video Transmitter or Flight
Controller setting s directly from the radio without connecting it to a computer
Allows flashing or radio receivers firmware directly from radio transmitter
Configurable via OpenTX Companion software where all models, settings and even full radio
transmitter firmware can be copied or backed up on the computer. Companion app can also
emulate radio transmitter firmware on the computer
Telemetry:
Telemetry is the data transmitted from the Radio Receiver back to the Radio Transmitter.
It usually contains a variety of information, depending on the type of radio and flight controller.
The most important information is battery voltage reading, current draw and "RSSI"
(Radio Signal Strength Indication).
This Telemetry Data can be displayed on the telemetry screen (in OpenTX),
and can also be customized as audio warnings.
Radio Receivers:
A Radio Receiver is the device capable of receiving commands from the Radio Transmitter,
interpreting the signal via the flight controller.
Radio Receivers can have the following features:
Telemetry (sending data back to transmitter)
Redundancy function (two receivers connected together, if one loses connection, second one takes over)
Easy removable antenna (more convenient with connectors if antenna is to be replaced)
Possibility of firmware upgrades (for bug fixes)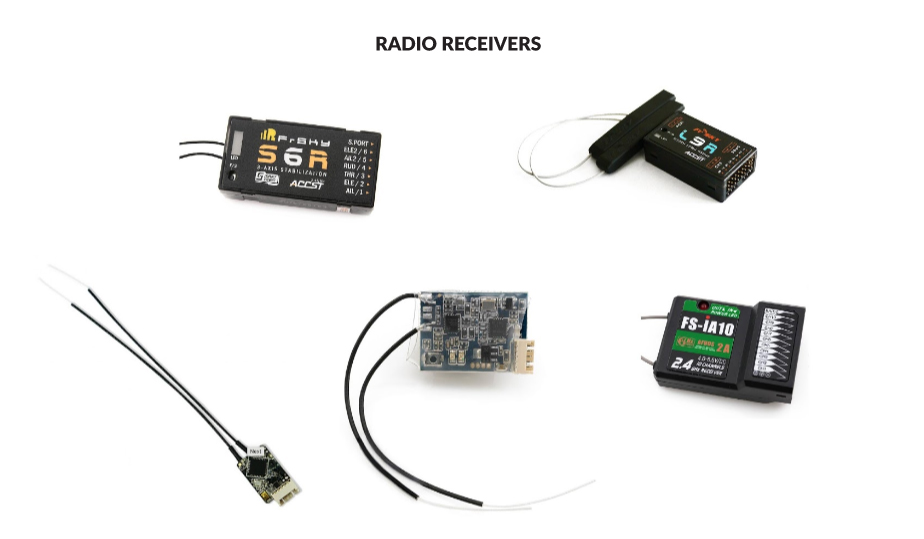
Different types of RC Radio Receivers
Protocols:
Radio communication protocols can split into two groups:
TX Protocols between Radio Transmitter and Radio Receiver.
RX Protocols between Radio Receiver and Flight Controller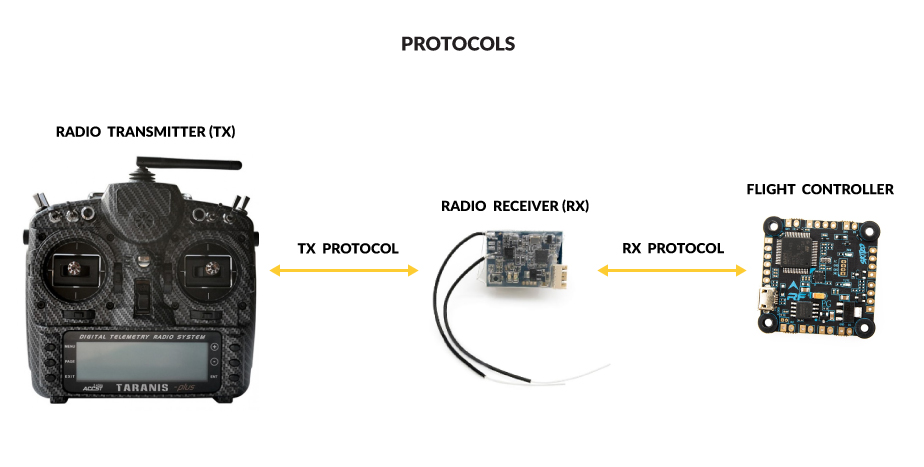
Difference between Transmitter Protocol and Receiver Protocol
TX Protocols are in most cases specific to brands:
FrSky: D8, D16, LR12
Spektrum: DSM, DSM2, DSMX
FlySky: AFHDS, AFHDS 2A
Futaba: FASST
Hitec: A-FHSS
Devo: Hi-Sky
As for RX protocols, some of them are universal:
PCM, PWM, PPM, SBUS
However, there are also brand specific ones:
TBS: CRSF Crossfire
Graupner: SUMD, SUMH
FrSky: FPort
Multiwii: MSP
Flysky: IBUS
JR: XBYUS
A Receiver must be compatible with the Radio Transmitter which means that the same
brand or Rx and Tx need to be purchased in order to establish a communication.
There are radio receivers that do not work with the same protocol.
Frequencies must also be the same on both Rx and Tx. For instance; a 2.4GHz Transmitter
can only work with 2.4GHz Radio Receiver.
Binding:
A Radio Transmitter will only communicate with a Radio Receiver if the two are binded.
This process might differ on specific receivers and radios. Usually, this can be done by
starting the BIND button on the receiver. The best would be to refer to the user manual of
your specific Rx and Tx combo.
It is important to note that a single Radio Transmitter can be bound to multiple different Receivers.
At the same time, a single receiver can only be bound to a single transmitter, not multiple transmitters.
Radio Receiver Antennas:
Receiver antennas are usually soldered to the receiver main board or attached by U.FL connectors.
Antennas are made from a coax cable where the main wire is separated from "ground".
Radio Receivers are usually manufactured with two antennas to ensure the best reception.
The main wire is the antenna element that receives radio signals via a specific frequency.
Length of the active element depends on the frequency and is exactly 1 / 4th of the
wavelength for a specific frequency. Length of the antenna wire is not fixed;
only active elements has to be at specific length. As am example, the wavelength for
2.4GHz transmission is 122mm. 1 / 4th of that equates to 30.5mm for the active element.
Receivers usually come with two antennas for 2.4GHz Frequency. In order to achieve the
best signal reception it is recommended to keep them at a 90degree angle in relation to each other
when installed on the multi rotor.
Radio Receiver Sizes:
Radio receivers come in a different sizes and shapes.
Smaller receivers have molex connectors while bigger ones have pins soldered on.
Smaller receivers are more convenient for smaller multirotors where mounting options for
hardware are very limited. Bigger receivers with pins can be used in more spacious multirotor builds.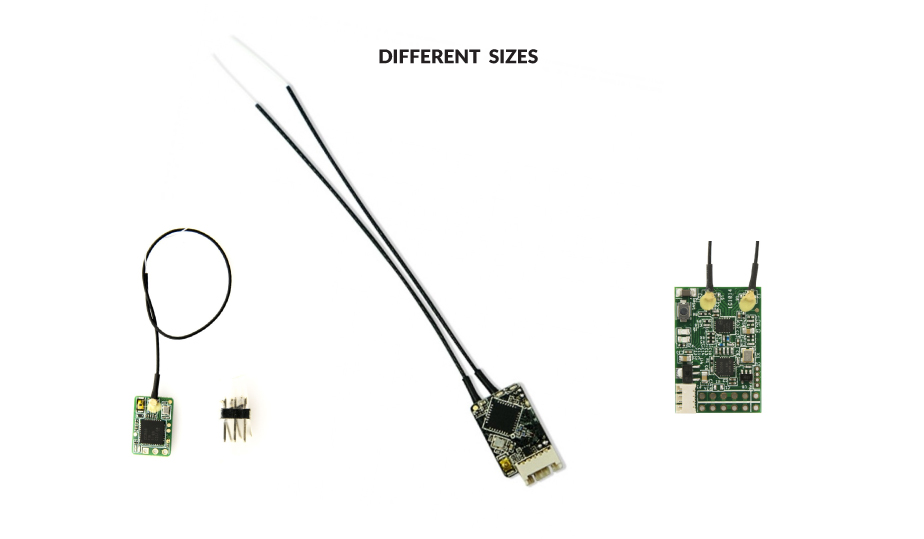
Different sizes of FrSky Receviers
Conclusion:
When selecting your FPV Drone Radio Transmitter and Receiver, it is important to confirm
that they are compatible not just with each other, but also that you have the necessary size
and features for your specific needs. It is recommended to purchase a high quality Radio
Transmitter when starting FPV as it is one of the components that will last long in this hobby.